In partnership with: 
Backcountry travel is dynamic; it’s physically demanding regardless of the method of travel, and shared with friends in ever-changing conditions and complex landscapes. It can be easy to get lost in the moment and lose focus, but in avalanche terrain you need to maintain awareness. To do this it helps to use simple checklists like the:
As you travel, maintain awareness of conditions. Use the Conditions Alerts checklist to direct your observations as you move, and to structure your conversations when you stop to talk. Some observations require deliberate actions, like digging down to look at layers in the snowpack, but many can be made on-the-go. For these, you don’t need to interrupt the flow; just incorporate them into your travel, and then discuss them when you stop to talk. If you notice anything unexpected, you may want to stop to talk sooner than originally planned.
When making conditions observations, an "absence of evidence is not evidence of absence." Just because you don’t see something doesn’t mean it doesn’t exist. Don’t allow yourself or your partners to forget this, and always acknowledge this inherent uncertainty.
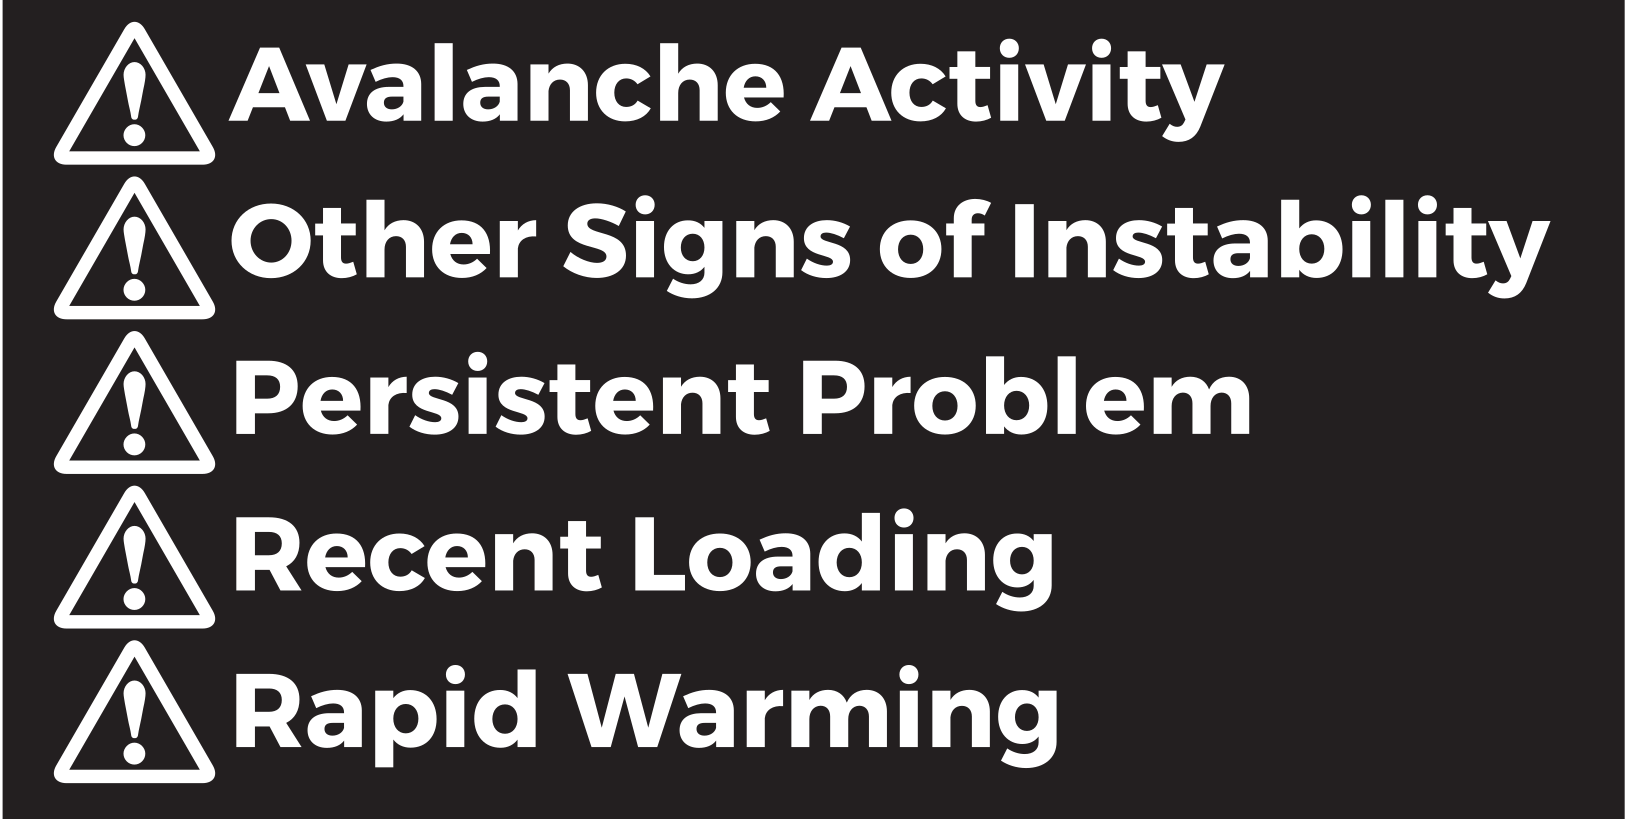
Avalanche activity, either recent or current, is a primary indicator that the snowpack is unstable. This is why it appears first on the Conditions Alerts checklist. As you travel, keep your eyes open for evidence of avalanches. More recent avalanches will appear angular and sharp, and older avalanches worn and rounded. If there’s also been recent snowfall or windblown snow, look for it covering the avalanche to help determine its age. Estimating the age of an avalanche is an inexact observation that takes practice. And remember that some types of avalanches have longer lasting instabilities than others, so even older avalanches can still be concerning.
If you do find evidence of recent or current avalanches, examine them closely. Are they on the weak layer or interface that you anticipated? Are they the size you anticipated? In the terrain you anticipated? If not, address this uncertainty when you next stop to talk.
Current avalanching could be due to natural triggers (weather) or human triggers. Although natural avalanching is more alarming than human triggering, any current avalanching regardless of the trigger should prompt you to stop to talk. If you didn’t anticipate it, you should probably rein in your safety margins.
Test slopes are a useful way to test for human triggering. These are small and relatively harmless slopes that are steep enough to avalanche but not big enough to bury or kill a person. Find small slopes that mimic the characteristics of the avalanche terrain where you plan to go, and try to trigger inconsequential avalanches before you commit to more consequential terrain. If you have any doubt about the potential consequences of test slopes, use spacing and spotting techniques for avalanche terrain. Triggering a test slope without a spotter can increase the consequences of even minor accidents.
 Cutting a small test slope
Other signs of instability include test slopes that produce shooting cracks but not avalanches; any collapse in the snowpack that doesn’t avalanche; and formal or informal snowpack tests that produce unstable results.
Shooting cracks are a common occurrence on test slopes. Look for a crack in the snow that propagates (shoots) from the point of initiation. Sometimes the snow downhill of this crack will displace but not climax into an avalanche. Any shooting crack, with or without downhill displacement, can be thought of as an avalanche that started, but didn’t finish. This is a sign of instability. If you trigger shooting cracks, it’s worth digging with your hands or shovel to investigate. Did it crack on the weak layer or interface that you anticipated?
A collapse in the snowpack without an avalanche, also called a "whumpf" because of the sound it makes, is similar to a shooting crack; it can be thought of as an avalanche that started, but didn’t finish. Like a shooting crack, the collapse needs to propagate to be thought of as a sign of instability. The farther the collapse propagates, the wider the avalanche could have been. Very often, collapses occur in flat or low angled terrain — at least that’s where survivors experience them. A collapse in steep terrain is usually followed by an avalanche. If you ever experience a collapse in steep terrain that’s not followed by an avalanche, it’s time to rein in your safety margins and buy a lottery ticket when you get home.
Formal snowpack tests are another way to look for signs of instability. They require practice, but the practice itself promotes lifelong learning and is highly valuable. Over the long term, if you want to gain experience instead of just gaining mileage, you should perform formal tests regularly. A few formal tests don't provide evidence of absence, so if you don’t find signs of instability, it doesn’t mean the instability doesn’t exist. But once you’ve practiced, they take little time and several can be done as you move around during the day.
You can learn proper technique for snowpack tests by watching online videos, but make sure they were performed by a professional. "Garbage in, garbage out" means you can't trust the results of snowpack tests that are performed incorrectly.
To perform formal tests, find terrain similar to a test slope. It should be low consequence and mimic the characteristics of the avalanche terrain you plan to go to. Unlike a test slope, it doesn’t need to be steep. The Compression Test and Extended Column Test are described below. Many more tests exist.
 Compression Test
Follow these steps for a Compression Test:
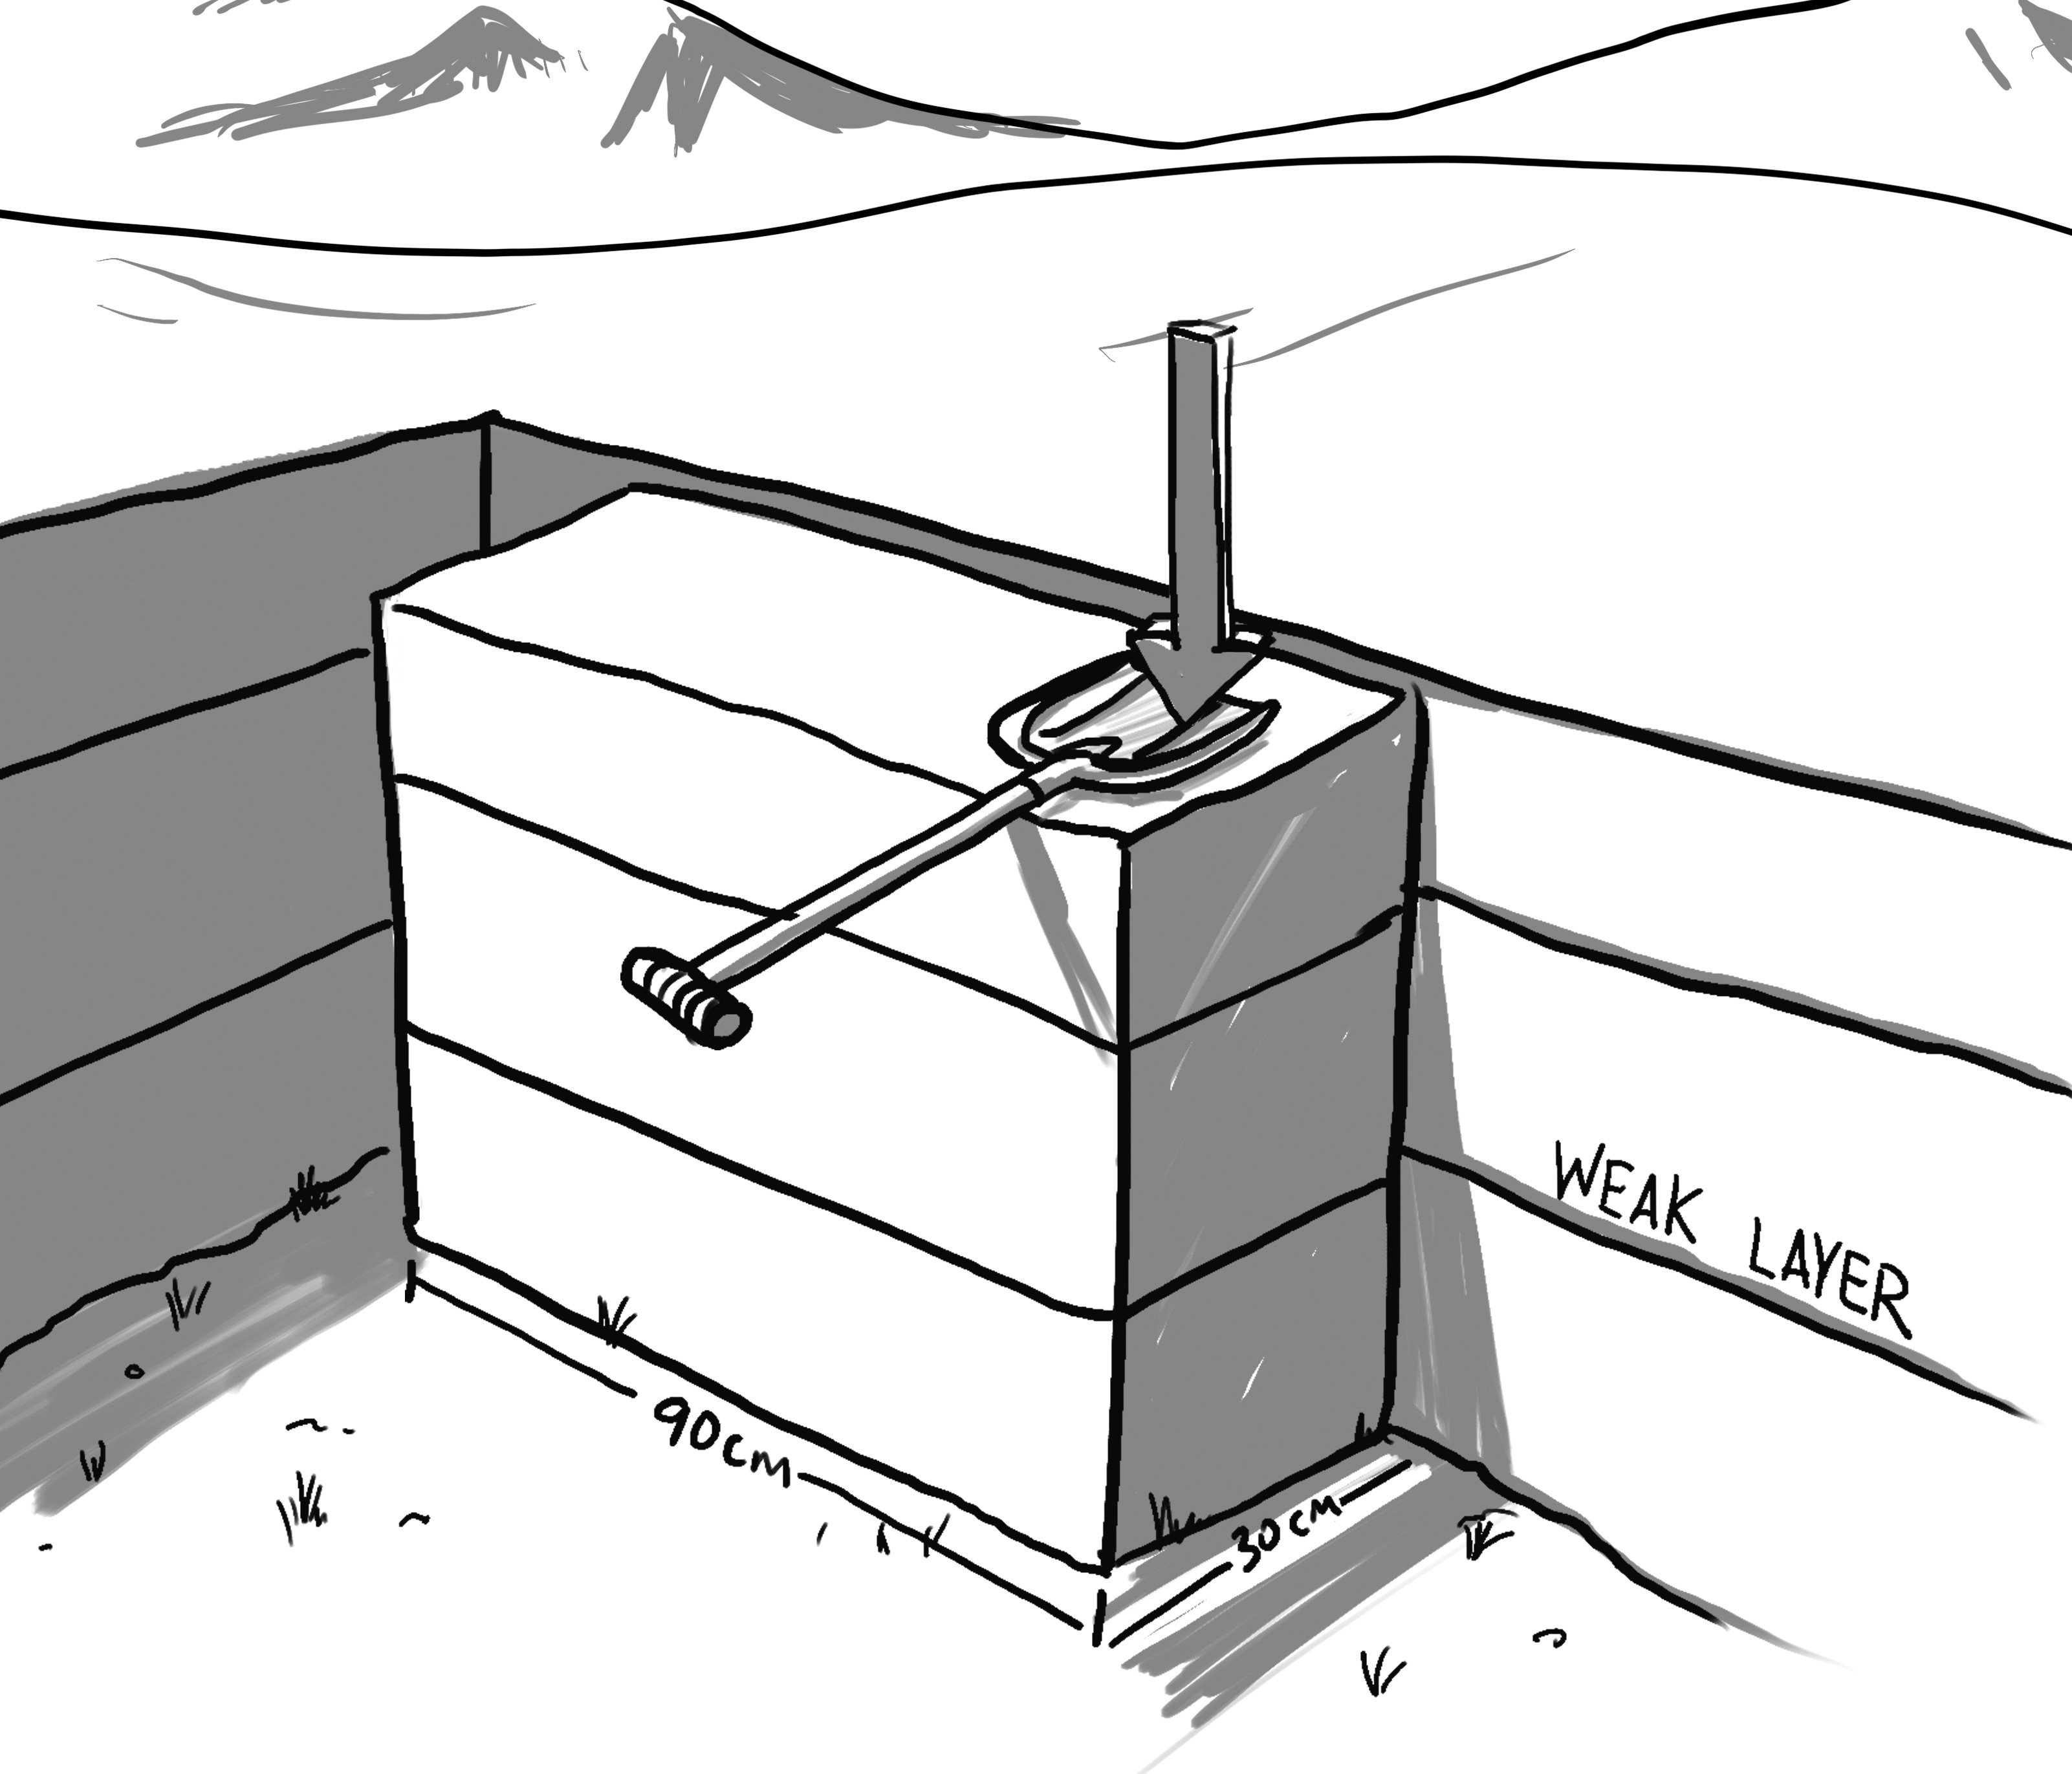 Extended Column Test
Follow these steps for an Extended Column Test:
Informal tests are easier to perform than formal tests, but they’re harder to interpret. It helps to practice informal tests right next to formal tests, so you can calibrate results. Once you become comfortable with interpreting them, they can be performed on their own. This saves time and allows you to perform numerous informal tests throughout the day.
The Hand Shear is a common informal test that’s very quick. It’s helpful to find or investigate weak layers near the surface. To perform a hand shear, use terrain similar to a test slope or where you’d perform formal tests, and follow these steps:
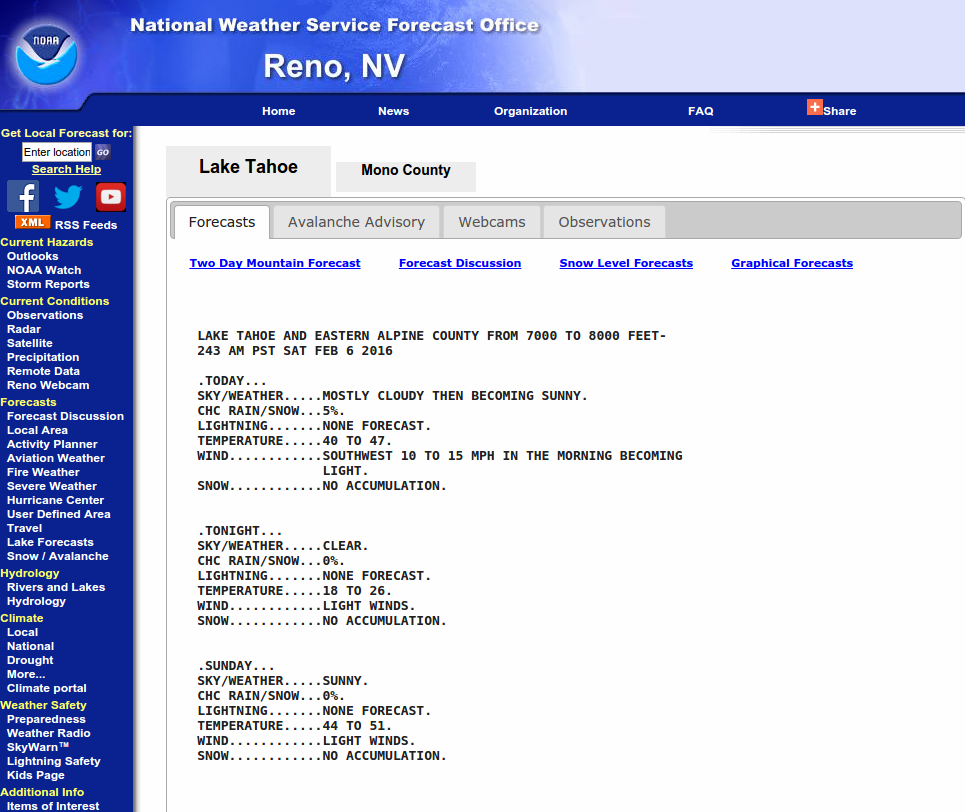
A Persistent Problem refers to any instability associated with facets or buried surface hoar. If the avalanche forecast warned of a Persistent Slab or Deep Slab problem, or mentioned a faceted or surface hoar layer in the snowpack, this counts as a Conditions Alert. These conditions are notoriously difficult to manage, and accident rates are high when they’re present. You can also look for buried facets or surface hoar yourself. This is especially important if you’re riding in an area without an avalanche forecast. Facets are large, angular and weak grains. Look for them near the ground, in low density snow, near crusts, and anywhere that warm and cold are next to each other in the snowpack. Buried surface hoar can sometimes be identified as a “grey stripe” in the snowpack. If you don’t find buried facets or surface hoar, this isn’t evidence of absence. But if you do find them, you should assume they exist elsewhere.
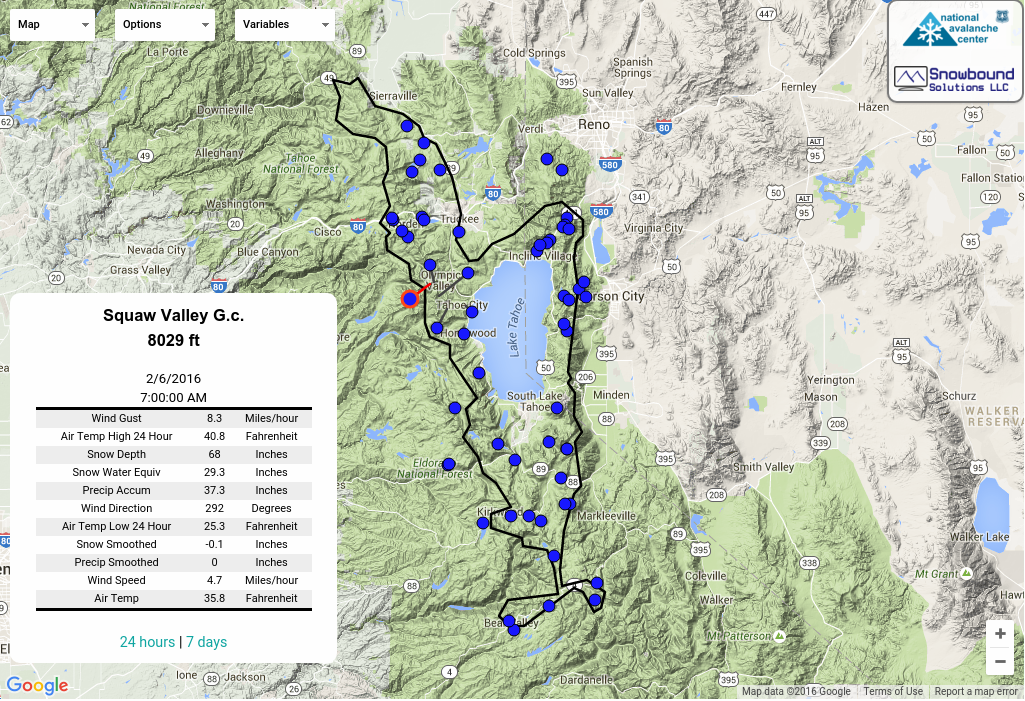
Recent Loading can be from snowfall, wind, or rain. Be careful with numerical thresholds when it comes to avalanches, but in general, ±12” of snow or ±1” of water that has accumulated within the past 24 hours is considered recent loading (including current loading). Don’t ignore recent loading that doesn’t quite meet these thresholds, and recognize that loading could be greater just around the corner from where you are. Loading from wind can be highly variable. Overall, the more loading and the more recent, the more concerning it is.
Rapid Warming can introduce liquid water into the snowpack if air temperatures rise above 32o, or if strong sun warms surface snow to 32o. Roller balls are clumps of wet snow that roll downhill and collect additional snow. They are often precursors to wet avalanches when temperatures are above 32o, and make good indicators for rapid warming. Sometimes rapid warming that doesn’t quite reach 32o can still soften the slab overlying a weak layer, and increase the likelihood of avalanches even if temperatures don’t go above 32o.
Use the Terrain Alerts checklist to maintain awareness as you travel and also when you stop to talk to evaluate the terrain ahead. The more Conditions Alerts that are present, the more Terrain Alerts you should avoid. However, these checklists aren’t intended for rule-based decision making. They are intended to help you maintain awareness, and to promote discussion among your group before deciding if to proceed, and how.

Slopes Steeper than 30o are considered avalanche terrain. Also treat any terrain below or immediately adjacent to slopes steeper than 30o as avalanche terrain. Although occasionally avalanches can occur on lower angled terrain, they are unusual. Teach yourself to recognize slopes steeper than 30o by using a level app on your phone, or a magnetic compass with a slope meter, or a dedicated slope meter made specifically for avalanche terrain evaluation. Don't expose yourself to avalanche terrain just to measure the slope angle - this is something you need to develop an eye for over time.
Obvious Slide Paths below treeline contrast adjacent terrain due to a lack of trees, or have thin or young tree cover compared to adjacent terrain, or have other vegetation clues like broken trees and broken branches. Above treeline, obvious avalanche paths are clearly steep with start zones between 35-40o and may have old debris as evidence of previous avalanches.
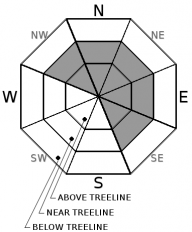
Terrain that Matches the Advisory refers to the locations by elevation and aspect where you or the regional forecasters anticipated avalanches to occur. Remember, avalanche forecasts are broad generalizations across the whole region that may have high levels of uncertainty when scaled down to specific terrain. Don’t try to convince yourself that terrain doesn’t match the advisory because it’s just slightly different from what was described in the forecast.
In big or convoluted terrain, classifying a particular slope by elevation or aspect can be problematic. These slopes may have characteristics of multiple elevations and aspects because of their length and size. Allow room for error.
Trigger Points are features where avalanches are most likely to be triggered. These are places where either the weak layer is especially weak, where the slab above the weak layer is especially thin, or where the stress on the snowpack is greatest. Common trigger points include any part of the slope between 35-40o, convexities and concavities, shallowly buried rocks, steep slopes below cornices, and open areas near trees or exposed rocks that interrupt the slab and/or absorb heat from the sun.
Terrain Traps are features that increase the consequences of even small avalanches, by increasing possible burial depths, increasing the chances of trauma, or by making drowning and/or hypothermia likely. Terrain Traps include depressions and gullies, open holes, abrupt transitions from steep to flat, trees, rocks, cliffs, cornices, and any open water in or near an avalanche path. Prior to entering avalanche terrain, identify locations of Terrain Traps in order to avoid them. Even if you’ve established that you’re not in avalanche terrain, it’s helpful to identify Terrain Traps since they may also represent non-avalanche hazards.


This website is owned and maintained by the non-profit arm of the Sierra Avalanche Center. Some of the content is updated by the USDA avalanche forecasters including the forecasts and some observational data. The USDA is not responsible for any advertising, fund-raising events/information, or sponsorship information, or other content not related to the forecasts and the data pertaining to the forecasts.