In partnership with: 
Good group management is the glue that holds your risk management plan together when you’re out on the snow. As you travel, manage your group using well-defined communication techniques, and spacing and spotting techniques appropriate for the terrain. Try to use these as consistently as possible from day to day, even as your partners may change. You’ll minimize confusion, develop good habits, and spread good technique to others. Manage your group using techniques for:
Between the times that you stop to talk, you'll still need to communicate with your partners. Radios and hand signals can help tremendously.
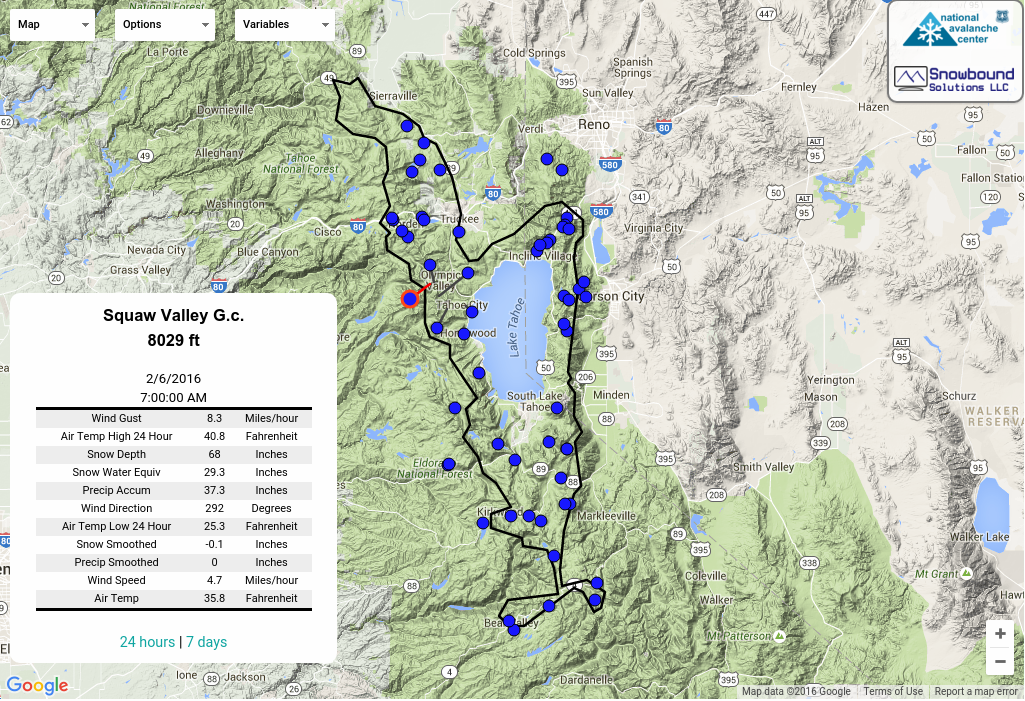
Radios have become more and more common in recent years, even among non-motorized users. If you and your partners don’t already use them, you should. Use a simple FRS/GMRS radio with a wired and weather-resistant speaker/mic attached to your vest or pack shoulder strap (motorized users, beware of in-helmet voice activated systems that transmit heavy breathing and engine sounds). Test the speaker/mic attachment and add cable ties or something similar if needed. Store the radio away from your avalanche beacon, someplace easily accessible in case you need to change channels or turn the radio off while performing a companion rescue. Orient the antenna vertically. All antennae within your group should be oriented similarly for maximum range.
Research FCC regulations before choosing a frequency or setting your radio’s power level. If you’re using a low powered pre-programmed radio, you may still technically need a license even though enforcement is uncommon. If you’re using a high powered, programmable or commercial radio, you’re more likely to need a license. Note that not all programmable radios are able to operate on FRS/GMRS frequencies, and even if they can, it might not be legal.
Most manufacturers of pre-programmed FRS/GMRS radios use the same channel/frequency/privacy code conventions, so different brands are able to communicate with each other. If anyone in the group is using a programmable radio, you might want to print a frequency chart or download it to your phone.
Communication via radio should be brief and to-the-point. There may be other people on the same frequency, and even if not, brevity can help minimize confusion, especially when someone is in exposed terrain. Think about what you’re going to say before you press the button to talk. When you do talk, address the recipient by name and use clear and simple language. If you’re directing someone through terrain, only give positive direction, not negative. If you break this rule by telling someone “don’t go left,” they may only hear “left” and go that way by mistake. Some “10 codes” are helpful, but if you plan to use these, make sure everyone in your group knows them before you leave the trailhead:
Bring extra radios and extra batteries to the trailhead in case your partners need them. Even if everyone in the group has a functioning radio when you leave the trailhead, they are prone to failure, so your communication shouldn’t rely on them entirely.
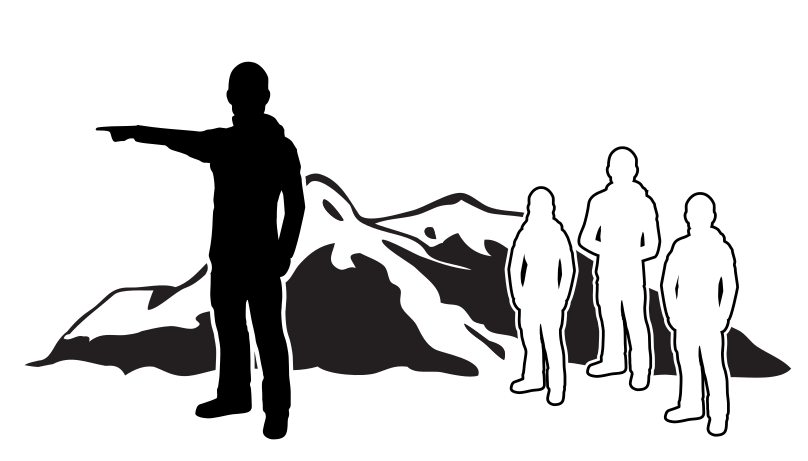
Hand signals are complementary to radios, and can serve as backup if radio communication fails. There have been a few attempts at standardizing hand signals for backcountry travel, but they haven't achieved widespread acceptance. Other sports and activities use hand signals that may be useful, or may have entirely different meanings. As with radio 10 codes, make sure your partners agree to specific hand signals before you start using them. If you come across other groups, don’t assume they’ll be using the same signals or understand yours.
 The "All Clear" hand signal
Stop to talk prior to entering non-avalanche terrain, as described previously. At the end of your stop, determine the spacing and spotting techniques you’ll use to reduce exposure to non-avalanche hazards and reduce consequences if anything goes wrong. The “buddy system” and the “tap-out” are two popular techniques in non-avalanche terrain.
The buddy system refers to traveling simultaneously in groups of twos or threes. If you have more people in your group, break out into multiple smaller groups. Space out enough to reduce exposure to non-avalanche hazards. For example, if you’re above a cliff, go one-at-a-time. For spotting purposes, try to keep visual contact as you move.
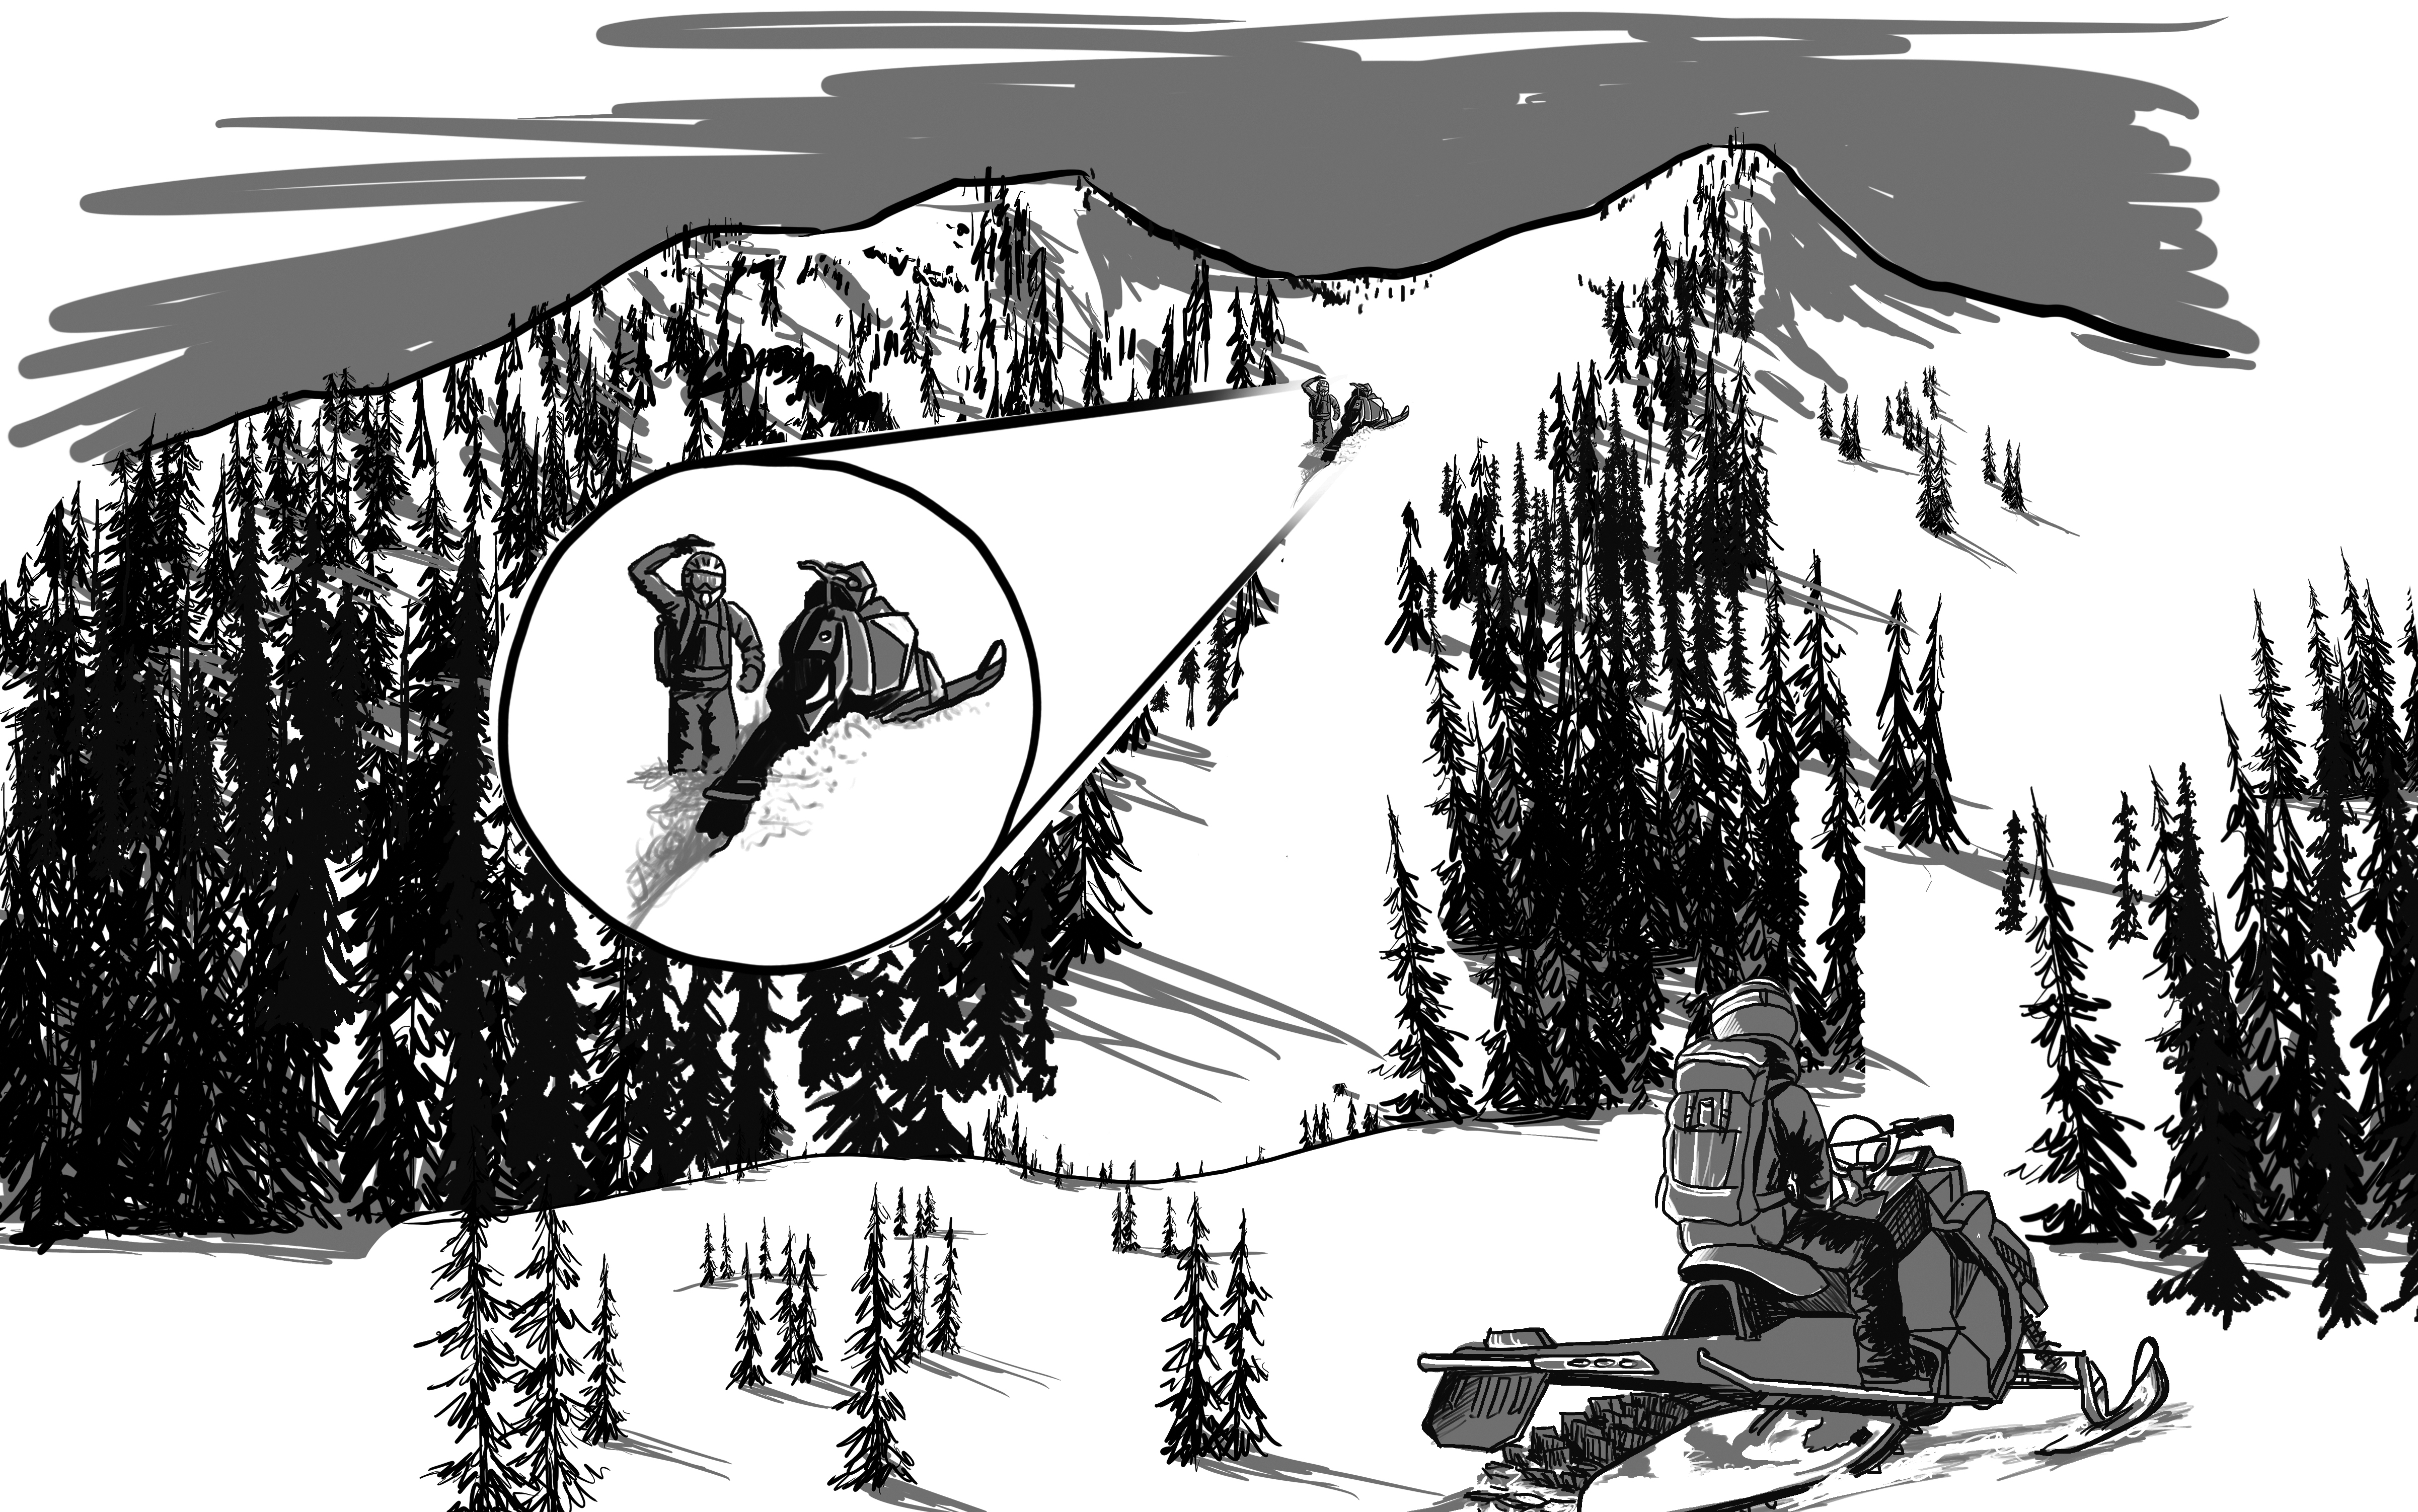
In terrain without good sight lines, like in trees or undulating terrain, keeping constant visual contact may be unrealistic for motorized users. If this is the case, stay within hearing distance of exhaust sounds. Regularly stop to listen, and ride towards exhaust sounds to regain visual contact often. Losing visual contact is likely to delay response times and increase the consequences of a non-avalanche accident, so make sure everyone accepts this.
The tap-out is a reference to the “all clear” hand signal, or head tap. As a spacing and spotting technique, it means to travel simultaneously, taking responsibility for the person behind you. Each person in the group regularly looks back to receive a tap-out from the person behind. The tap-out accommodates larger groups than the buddy system, and can help prevent making complete stops at every minor turn and transition. It works well for linear sections of travel, like an uptrack for non-motorized users, or a section of trail or other distinct handrail for motorized users.
Stop to talk prior to entering avalanche terrain, as described previously. If another group is in the terrain you plan to enter, either wait patiently for them to exit entirely, or move elsewhere.
One at a time is the norm for spacing in avalanche terrain. It very effectively reduces your group’s exposure to only one person. Large groups can break out into multiple smaller groups. Each group needs to find their own terrain; although it can be in the same general area, there should be no overlap within the same avalanche path. Don’t expose more than one person in the same path just because you’ve split into smaller groups. If you're too impatient to wait, don't travel in a large group to begin with.
Motorized users should not rush in to help a partner who's stuck in avalanche terrain. Instead, let them get unstuck on their own. If this isn't possible due to injury or similar issue, discuss a plan with your remaining partners, and keep spotters watching as only one person goes to help.
Spotters need to remain in an unexposed area, with eyes on the exposed person at all times. If your group is socializing, eating, tinkering with equipment, etc., then one person needs to avoid distractions and take responsibility for spotting. Depending on the size and shape of the terrain, you may have to break it into smaller "pitches" to keep eyes on. Look for less exposed places to "anchor off" along the way, and leapfrog your way through. If the terrain forces the exposed person to briefly move out of sight from their spotters, use radios to communicate.
The buddy system and the tap-out can be applied in avalanche terrain, but these are advanced techniques that can result in increased exposure (because more than one person is moving at a time). If everyone understands how to read the terrain very well, they can adjust spacing as they move, using terrain features to briefly reduce exposure and provide some separation in case of an avalanche. This should only be done when there are very low levels of uncertainty about partners and conditions, and when everyone has acknowledged and accepted the increased consequences associated with the exposure. If the anticipated conditions involve large avalanches, or avalanche types known for their unpredictable behavior, include this in your conversation before using the buddy system or the tap-out in avalanche terrain.


This website is owned and maintained by the non-profit arm of the Sierra Avalanche Center. Some of the content is updated by the USDA avalanche forecasters including the forecasts and some observational data. The USDA is not responsible for any advertising, fund-raising events/information, or sponsorship information, or other content not related to the forecasts and the data pertaining to the forecasts.